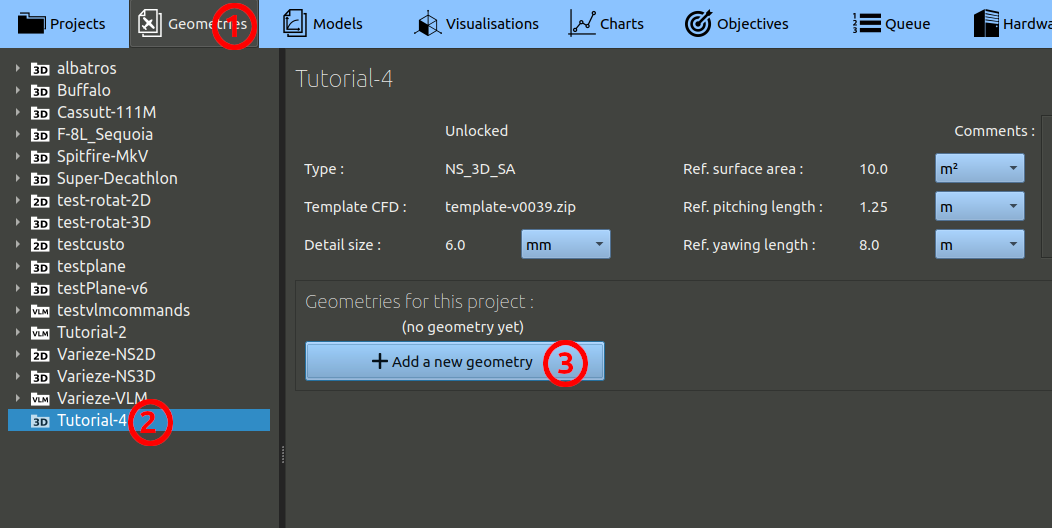
- In the navigation bar, click 'Geometries'
- In the tree on the left, choose the project you created at the preceding step.
- Finally, click the 'Add a geometry' button.
In the geometry creation form, set the parameters as:
- Name it 'Reference' as this is our first shot.
- You can add comments, but it is optional.
- Under the spitfire image highlighting the axis expected in the CAD, set the units of the CAD. The files provided have been exported in millimeters.
- Click the button to add reference parts, select the path to the IGS folder provided before, select the 4 parts present in the "Reference" sub-folder.
- Skip the moving parts and go down to the center of gravity setting. Set it to 0 / 0 / 0.
- The hole detection point is used to check the integrity of surfaces given. It is a point that is inside the solid given. Here the coordinate 0 / 0 / 0 will work.
- Skip the refinement parameters and go to the bottom to create the geometry.

Once created, go to the bottom of the geometry page and click the button "Add a configuration".
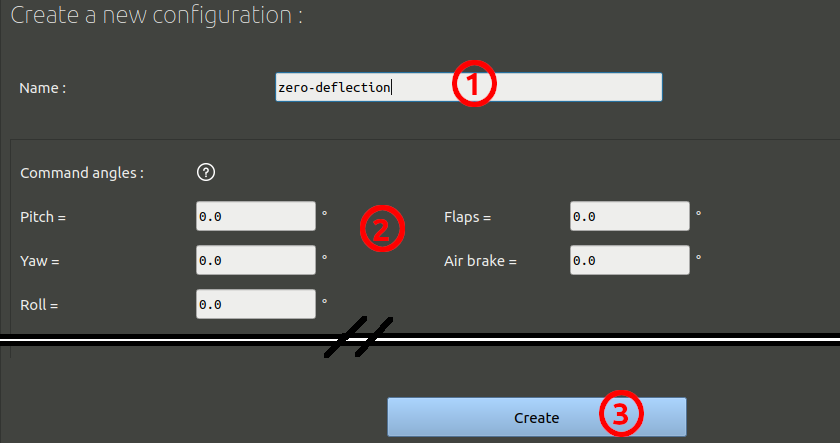
In this form:
- set a name, for example "zero-deflection"
- leave all command angles to zero.
- At the bottom, click the "Create" button.
Once created, the configuration page will display a button: "Build the configuration". If you press this button, the four parts will be assembled to one, checks to detect holes will be performed, the geometry will be scaled, etc. You can ignore this step, it will be done automatically when it will be needed. But you can also choose to click the button and perform these task now, to find out potential problems as soon as possible in your workflow.
If you click the button, you will have to wait a few minutes for theses task to be performed, then the page will present you a set of images, and you will be able to use the 3D visualisation button to observe how the geometry was imported. On these visualisations, holes will be highlighted in red.
In this example you may have a small red edge showing up. Do not worry, this one is not big enough to cause problems. You can ignore it and continue.