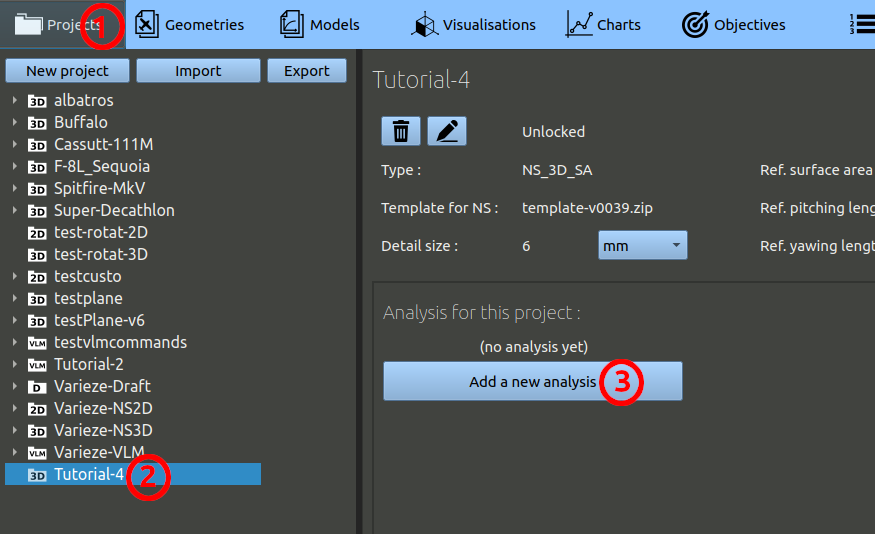
- In the navigation bar, click 'Projects'
- In the tree on the left, choose the project corresponding to this tutorial.
- Finally, click the 'Add a new analysis' button.
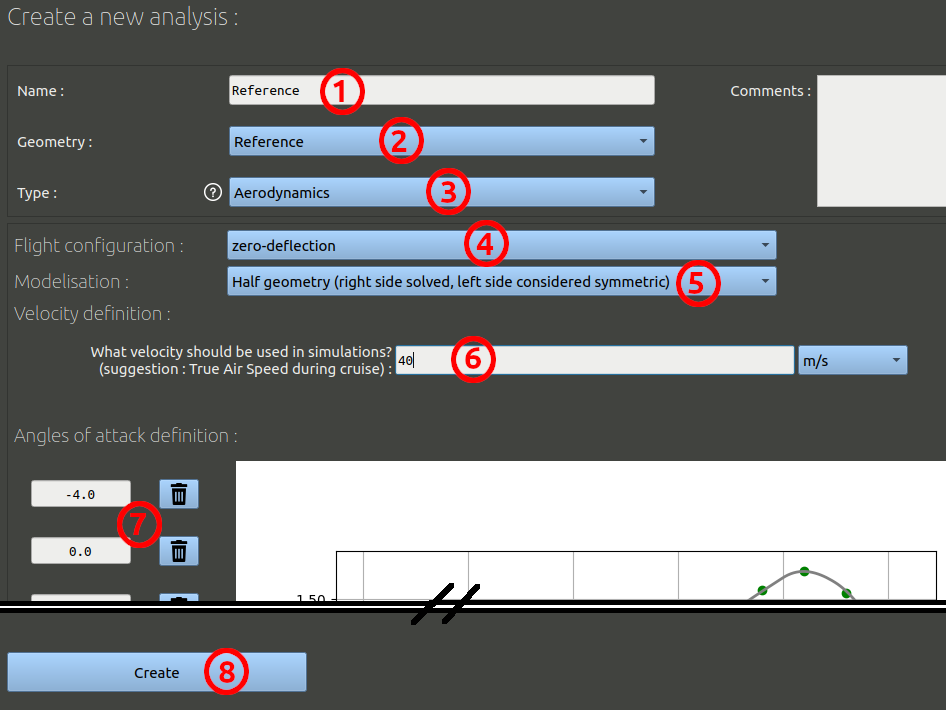
- We can name this first analysis "Reference", as it is run on the reference geometry.
- It is optional, but you can add comments.
- Make sure the geometry selected is the one you created before.
- The analysis type should be 'Aerodynamics'.
- Make sure the configuration is the one you created before.
- Instead of "Full geometry", choose an "Half geometry" modelisation. With this option, only the right side of the aircraft will be computed, the left side will be considered purely symmetric along the ZX plane. The computation will be faster with this option.
- Set a 40 m/s air speed.
- You may set the following list of angles of attack : -4 / 0 / 6 / 8 / 12 / 16 / 20.
- Validate the form at the bottom.
In the analysis page, make sure the tab selected is the 'Analysis set-up' tab, you should see a list of runs. Send them all to the Queue, and wait for the runs to be fully processed. This can take a day or two depending on your hardware.