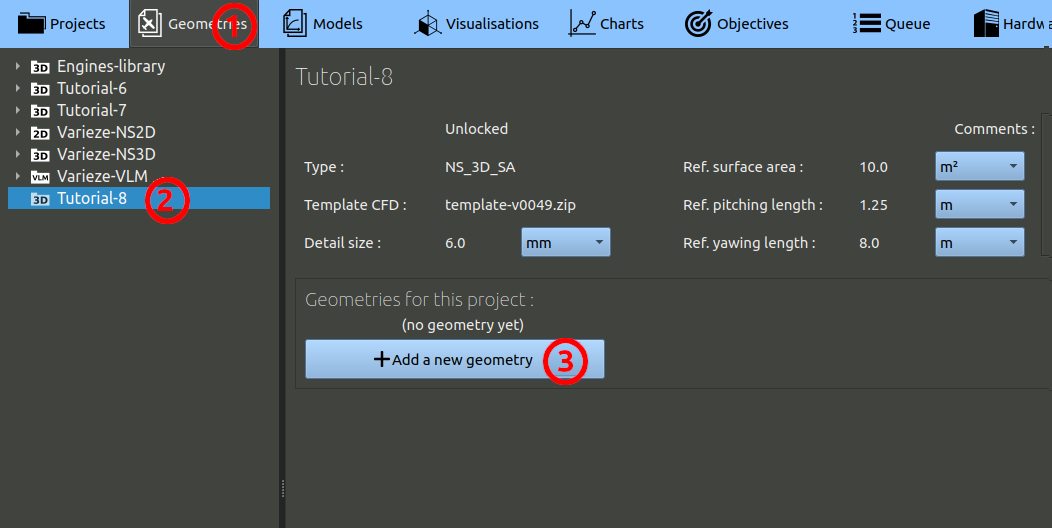
- In the navigation bar, click 'Geometries'
- In the tree on the left, choose the project you created at the preceding step.
- Finally, click the 'Add a geometry' button.
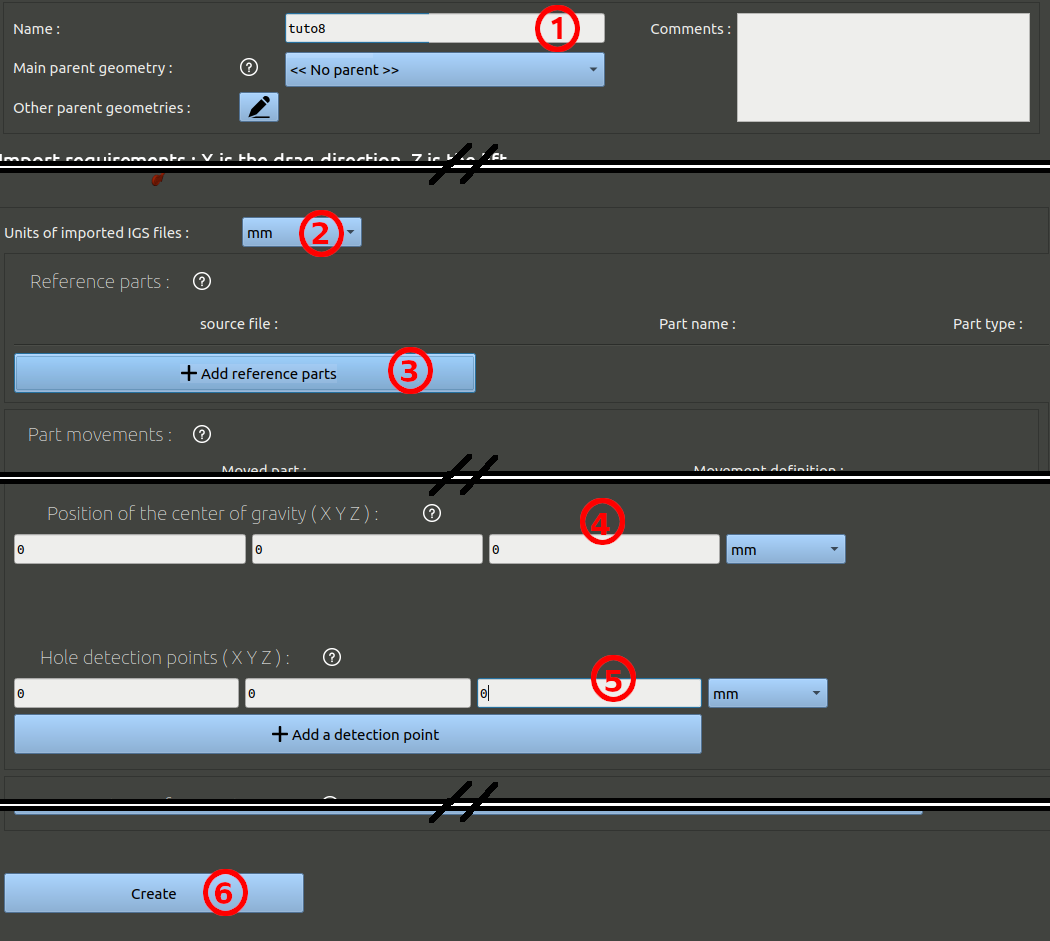
In the geometry creation form, set the parameters as:
- Set a name, 'tuto8' for example.
- check the units are millimeters.
- Click the button to add reference parts, select the path to the IGS folder provided before, select the 4 parts.
- Skip the moving parts and go down to the center of gravity setting. Set it to 0 / 0 / 0.
- The hole detection point is used to check the integrity of surfaces given. It is a point that is inside the solid given. Here the coordinate 0 / 0 / 0 will work.
- Skip other parameters and go to the bottom to create the geometry.
Once created, go to the bottom of the geometry page and click the button "Add a configuration".
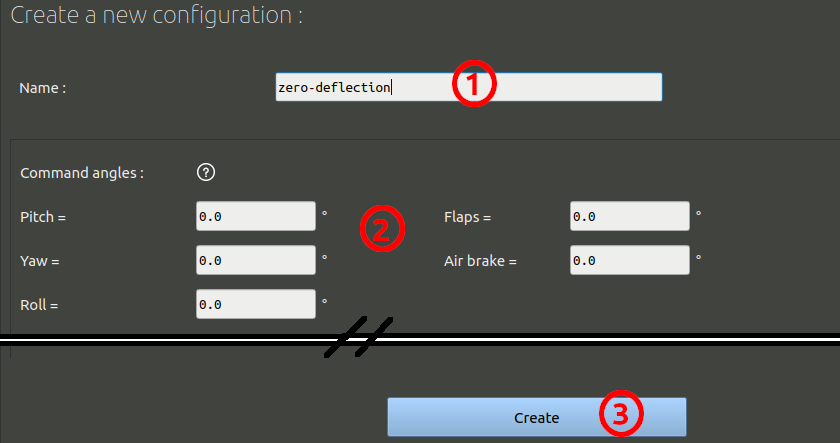
In this form:
- set a name, for example "zero-deflection"
- leave all command angles to zero.
- Skip other options, go to the bottom, click the "Create" button.