5 Improving the engine compartment

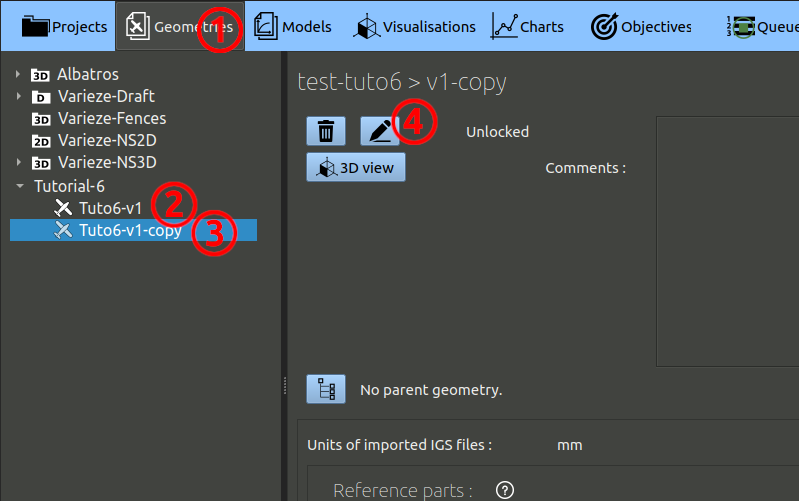
We will now create an alternative geometry 'Tuto6-v2' and check if this updated geometry gives a better result than the first one. This geometry has ducts going from the inlet to the engine cylinders, which may improve their cooling. 

  1. Click on the 'Geometry' tab in the navigation bar.
  2. In the tree on the left side of the screen, find and select the geometry you created before for this project, 'Tutov6-v1'. On the keyboard, hit ctrl+C, then ctrl+V to duplicate this geometry.
  3. A geometry called 'Tuto6-v1-copy' will appear in the tree, select it to display its details.
  4. On the top of the main screen, click on the button to edit the parameters of this new geometry.

Image IMG-K1  

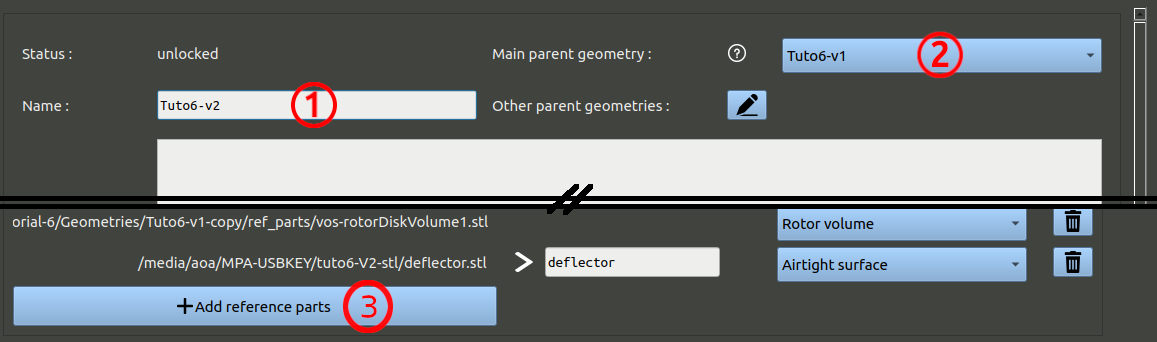
Now, we will change a few parameters and parts in the new geometry.

  1. In the edition window, edit the name from 'Tutov6-v1-copy' to 'Tutov6-v2'.
  2. Set 'Tutov6-v1' as being the parent of this new geometry.
  3. Using the bin icons, delete the following parts from the list:

Image IMG-K2  

Then import new versions of these parts:

  1. Click 'Add reference parts', and navigate to the part file, to the 'Tuto6-v2-stl' subdirectory. Import all parts from this folder. (5 parts should be added and should now appear at the bottom of the part list).
  2. Change the surface type for the report surface as 'Flow report surface'.

Image IMG-K3  
One of the part we replaced had a refinement definition, the part 'Tuto6-v1-1500um.stl. Because this part was removed its refinement definition was automaticaly switched back to the first name available in the list. Correct the refinement definition by associating it to 'Tuto6-v2-1500um.stl'.
 
Image IMG-K4  
Because we replace two 'reportSurface' parts, the list of flow report surfaces at the bottom of the window also became incorect. Set it back to the correct order : 1 ,2, 3 ; before validating the form with the OK button.
 
Image IMG-K5  

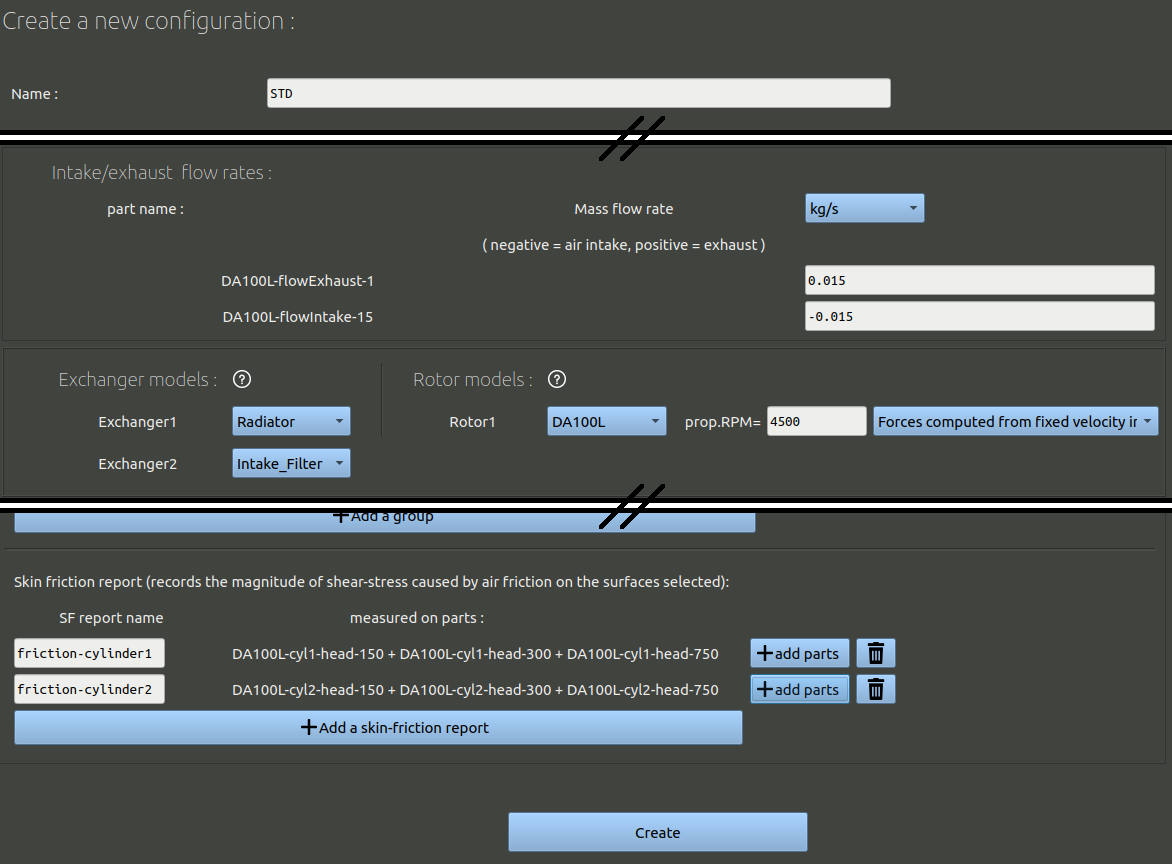
The software will need a couple of minutes to re-process the parts. Then at the bottom of the page showing the geometry parameters, you can hit 'Add a configuration' to define a flight configuration similar to the one created before for the v1:

Image IMG-L  

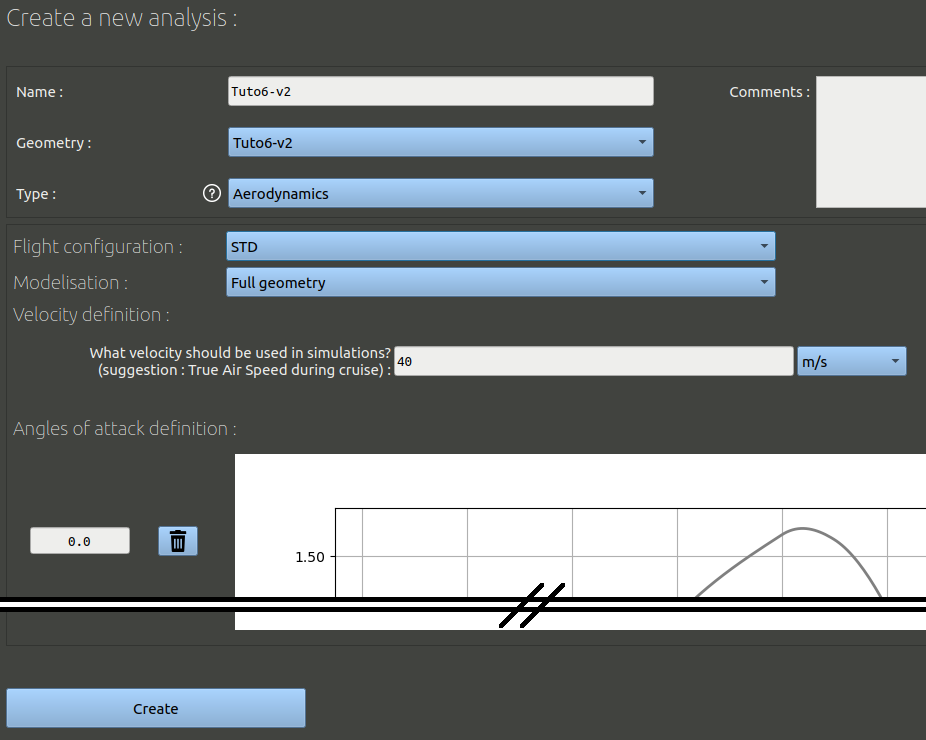
Go back to the 'Projects' tab and create an analysis similar to the one created before for the geometry v2.

Image IMG-M