Before adding the configuration, we need to define modeling laws for our propeller and heat-exchanger. Let's start by creating a model for our water radiator. Its core will be modeled as a porous volume, while the water boxes and frame are modeled as airtight surfaces. The law we must define will be applied to the porous volume.
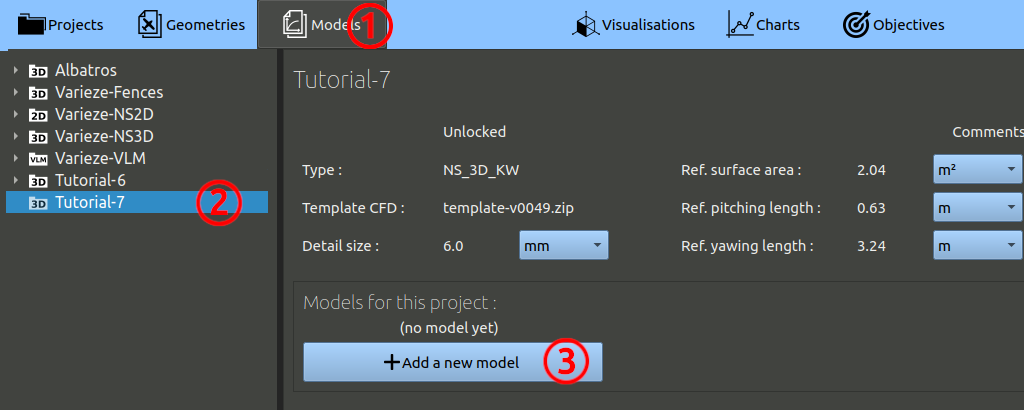
- In the navigation bar, click 'Models'.
- In the tree on the left, choose the project you created at the preceding step.
- Finally, click the 'Add a model' button.
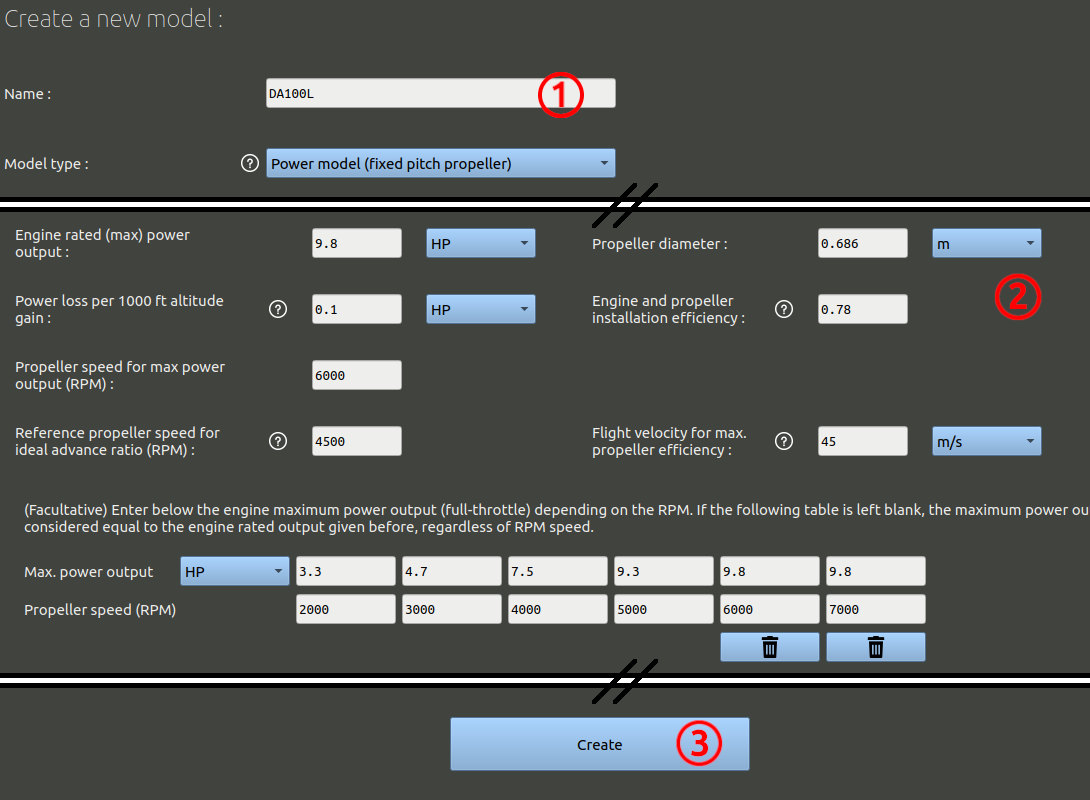
Let's create the model for the rotor5, the push propeller with a 2-strokes engine:
- Name it 'DA100L' and select the Power model with fixed pitch propeller.
- Enter the values of perfomance for this power unit, like in the image below.
- Create the model.
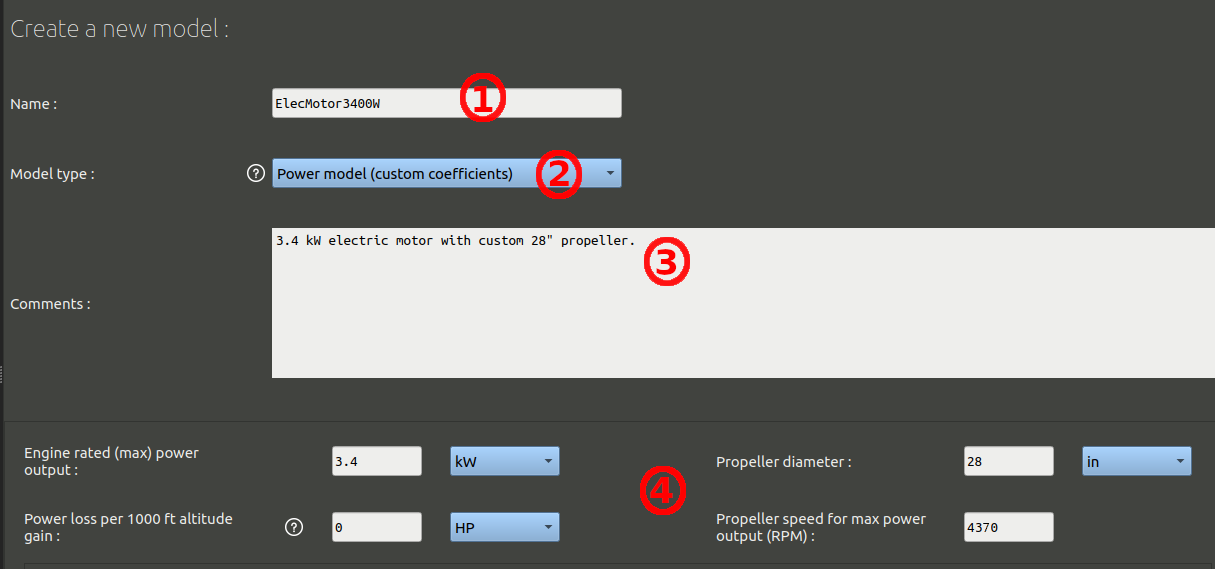
Then we can create the model for the other rotors, the VTOL propellers powered by electric motors.
- Name it 'ElecMotor3400W' for example.
- Select the Power model with custom coefficients.
- You may add a comment.
- Enter the values of performance for this power unit, like in the image below.
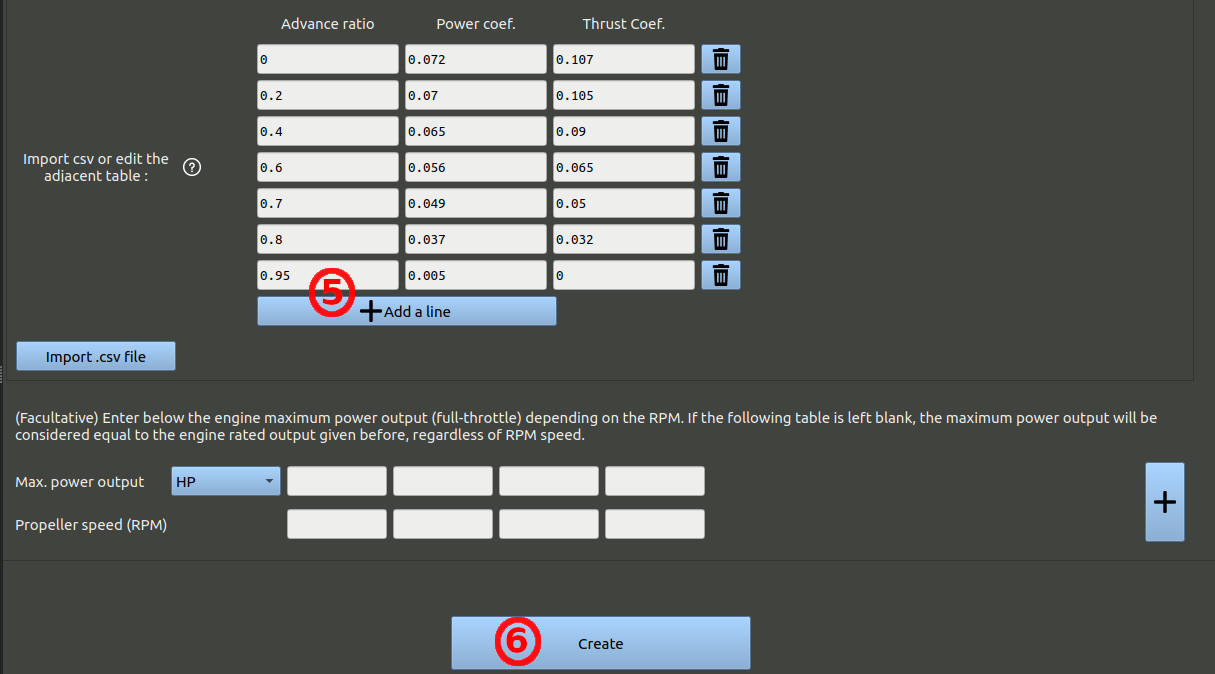
- Add lines of coefficients to create a table similar to the one shown in the next image.
- Create the model.
These models we created must now be associated to our geometry to define a specific flight configuration. We want to create a couple of configurations:
- One configuration to simulate hovering at 0m/s but with a forward acceleration. VTOL engines are running at high speed (4300RPM) to lift the aircraft. The push propeller also runs at high speed (4500RPM) to model the forward acceleration.
- One configuration to simulate the middle of the transition, around 24 m/s of horizontal velocity. VTOL engines are running at a lower speed (3300RPM) because the wings start generating a bit of lift and the VTOL engine can start to slow down. The push propeller still runs at high speed (4500RPM) to continue increasing the forward velocity.
Let's start with the first one:
- In the navigation bar click "Geometries" and in the left tree select the geometry we created earlier. At the bottom of the geometry data, click the button "Add a configuration".
- Set the name, for example "elec4300-therm4500", Leave all command angles to zero.
- Set the correct model for each rotor.
- Set the speed for each rotor.
- For all rotors switch the force calculation to "computed from local airflow".
- Finally, click the "Create" button at the bottom.
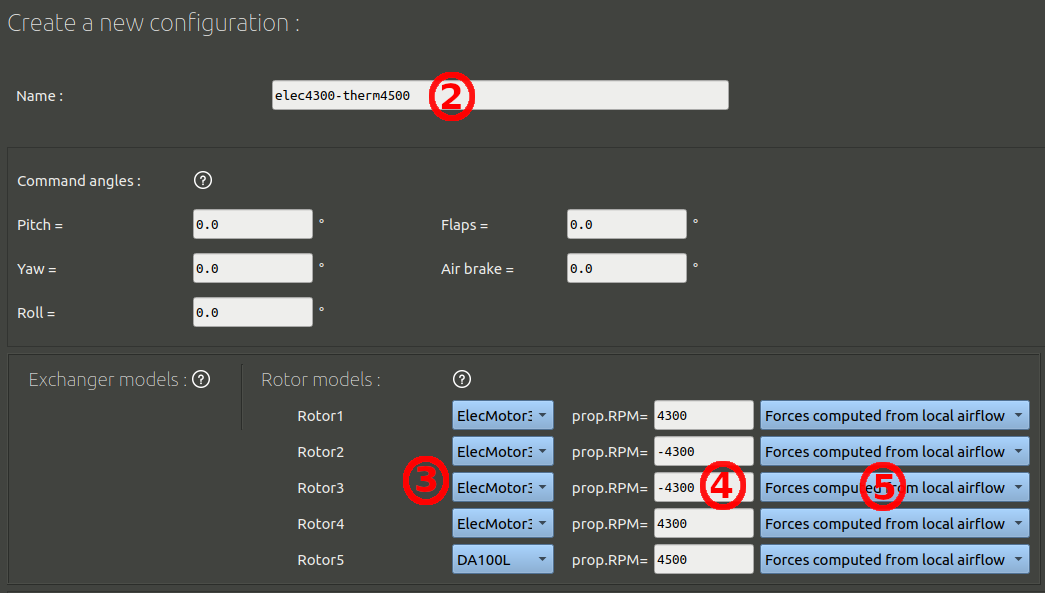
NB: Some rotors have positive RPM values and some have negative values. This is because some rotate clockwise and some rotate counter-clockwise.
Now we can create the second flight configuration:
- In the tree on the left side of the screen select the configuration we created. Then hit on the keybord the Ctrl+C then Ctrl+V shortcut to make a copy paste.
- Select the duplicate that was created, click the edit button.
- Rename this configuration : "elec3300-therm4500" for example.
- Modify the speed for the electric rotors to +/-3300 RPM instead of +/-4300 RPM.
- Finally, click the "OK" button at the bottom.