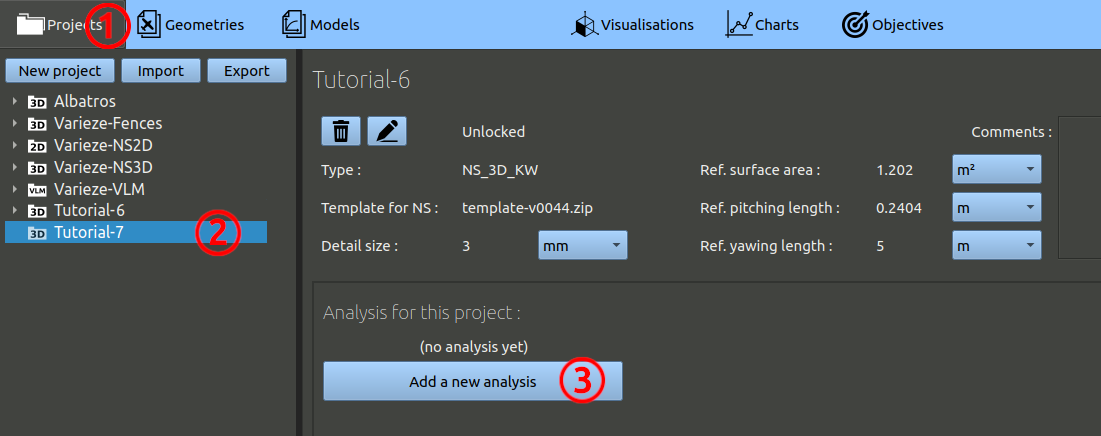
- In the navigation bar, click 'Projects'.
- In the tree on the left, choose the project corresponding to this tutorial.
- Finally, click the 'Add a new analysis' button.
Our models can either :
- compute the flow around the aircraft in a domain having an air inlet and air outlet. Meaning we will have an horizontal airflow in the domain. In that case we can use a "Custom" analysis to set all the parameters as we need in terms of speeds, angles, air properties.
- compute a flow generated by the propellers in a domain having free stream boundaries. Meaning there is no velocity between the aircraft and the ground, the only flow is a local flow from the propellers. In that case we can use a "VTOL" analysis that will set us up for a hovering case.
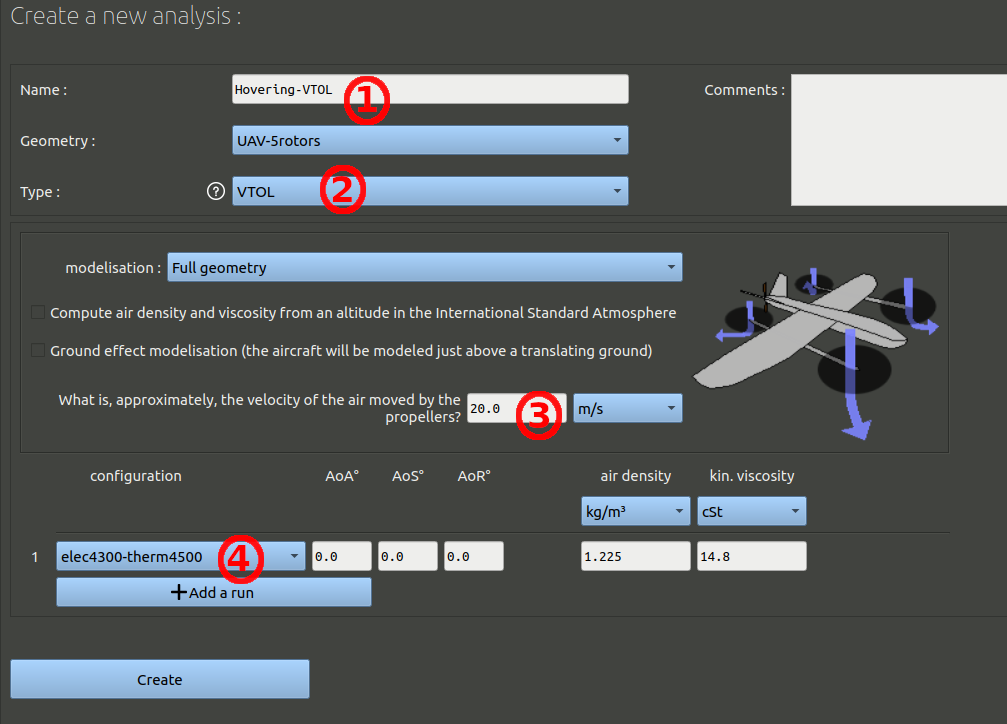
Let's start with the VTOL analysis
- We can name this first analysis "Hover-VTOL", check the geometry selected is right.
- Select the type "VTOL".
- Change the estimated flow velocity to 20 m/s. This initialises the turbulence conditions and color scaling in the post processing.
- Set the configuration to the one with the electric motor at 4300 RPM.
- Validate the form at the bottom.
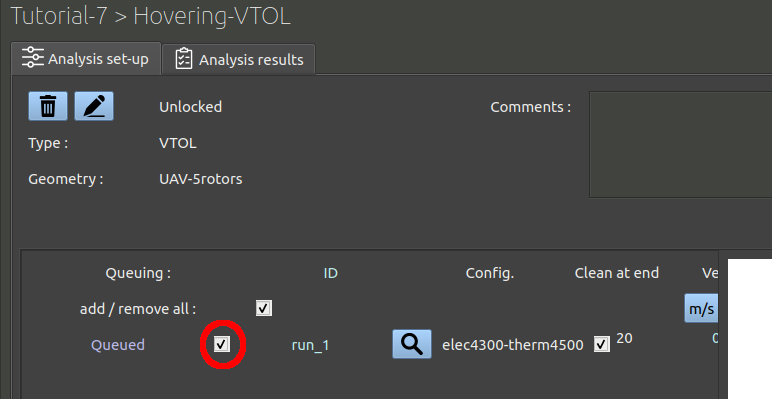
After creating this analysis you can send the run to the queue.
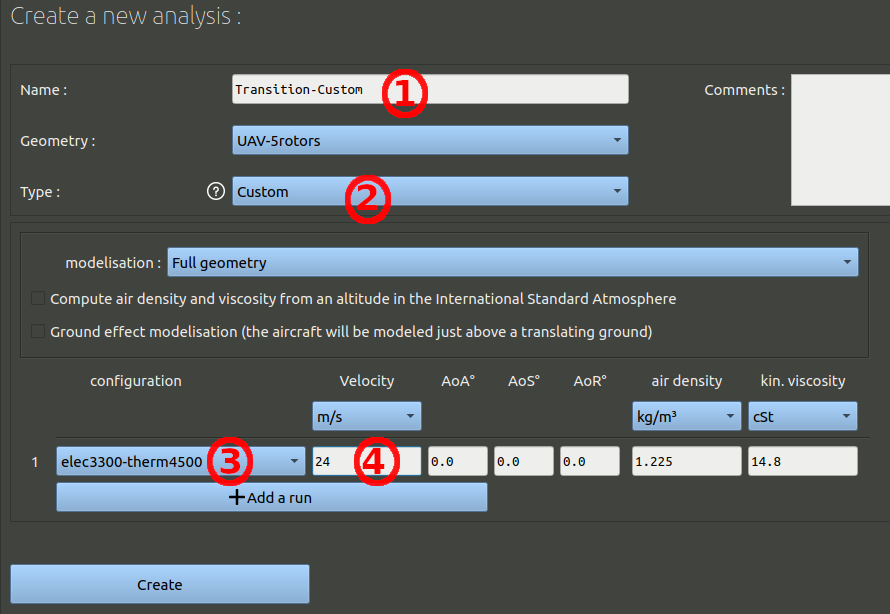
Then we can create the custom analysis:
- We can name this first analysis "Transition-Custom", check the geometry selected is right.
- Select the type "Custom".
- Set the configuration to the one with the electric motor at 3300 RPM.
- Change the airflow velocity to 24 m/s. Regardless of the acceleration produced by the propellers, the aircraft will move forward at 24 m/s compared to the ground.
- Validate the form at the bottom.
After creating this analysis you can send the second run to the queue.
Finally, you can click the "Queue" button in the top navigation bar, and start the processing of the run with the green 'play' button:
